
Automatic Time Card Changes in TimeTrak Enterprise
If your facility recently experienced an extended outage, this feature can rebuild missing time card data for a large group of employees at once, using each employee's schedule.
Step 1: Open Maintenance
From the main menu, choose File, then Maintenance.

Step 2: Open Automatic Time Card Changes
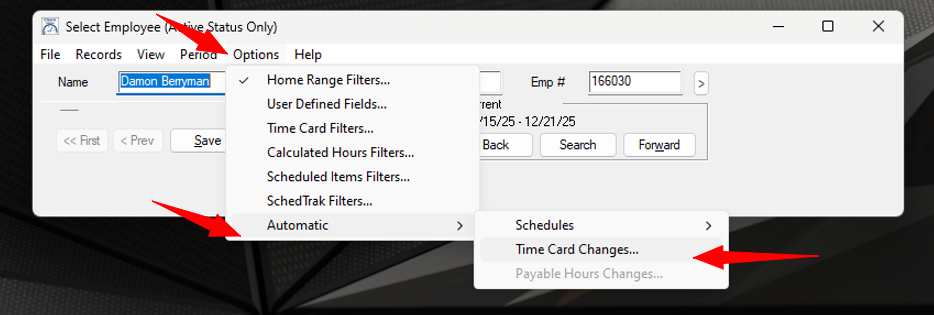
From the Maintenance menu choose Options, then Automatic, then Time Card Changes.
Step 3: Review the Automatic Time Card Changes screen
Step 4: Select your pay dates
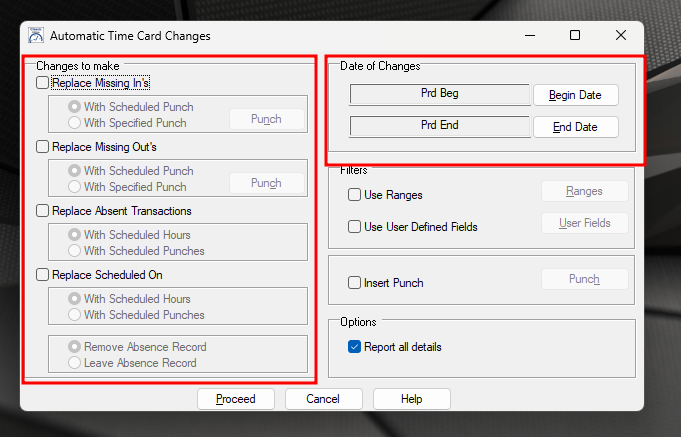
Near the top of the window, set the Begin Date and End Date for the outage period. If you are correcting a single day, enter the same date in both fields. Only time cards inside this range are touched.
Step 5: Choose the changes to make
| Option | What it does |
|---|---|
| Replace Missing In Punches | Fills in a missing In punch using the employee's scheduled start time. |
| Replace Missing Out Punches | Fills in a missing Out punch using the employee's scheduled stop time. |
| Replace Absent Transactions | Replaces an Absent record with either scheduled hours or scheduled In and Out punches. Pick one of the two sub options. |
| Replace Scheduled On | Replaces a Scheduled On day with either scheduled hours or scheduled In and Out punches. Pick one of the two sub options, then choose whether to remove or leave any Absence record on that day. |
For an outage where employees worked their normal shifts, the most common selection is Replace Missing In Punches and Replace Missing Out Punches.
Step 6: Narrow the group (optional)
Use the filters to limit changes to an employee number range, cost center, department number, or employee class. An employee must match every condition you specify before any change is made. Running one department at a time is a good way to keep the results easy to review.
Step 7: Employees without schedules
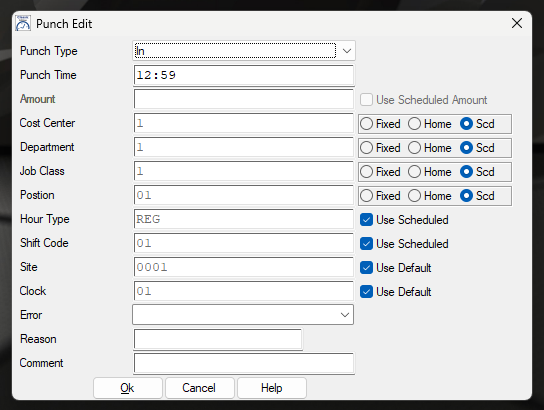
Automatic Time Card Changes relies on schedules. For employees who are not scheduled, use the Insert Punch feature instead to add the needed punch.
Step 8: Turn on Report All Details, then Proceed
Leave Report All Details checked. It produces a list of every change made, including date, type of change, employee name, employee number, and badge ID, which you can view or print.
Click Proceed to continue to the Report Output Format window and process the changes, or Cancel to close without changing anything.
A few good habits
- Verify that clock punches have finished uploading before you run anything.
- Keep the date range as tight as the outage itself.
- Start with a single department or a small employee number range, review the report, then expand.
- Save or print the detail report for your payroll records.